> ~ Insights by SewCalGal ~
Showing posts with label DIY Projects. Show all posts

Tuesday, October 2, 2012

Fall EQ Blog Hop - Tutorial for using EQ7 for Glass Etching


Today I'm going to share insights with you on how you can use the wreathing tool in EQ7, as well as how to use EQ7 to create a design to etch glass.  My example will focus on a simple flower design and etching an inexpensive glass plate, which I purchased at IKEA for ~$0.99.  I think such a plate would make for a nice gift, full of holiday baked goods!


I made this simple flower design and used the wreath tool in EQ7 to create the petals.

This tutorial is broken into two phases:  Using EQ7 to create the motif and Glass Etching.

If you are new to EQ, SewCalGal encourages you to try my "15 minute per day" plan for learning EQ.  Certainly the more time you have to learn the faster you'll learn about the robust functionality that this software has to offer.  But, if you only have a few minutes even 15 minutes can be fun and a great way to learn.  Play, create, take advantage of all the free tutorials on the EQ website.  I'm particularly fond of the
Benni Harper lessons:  http://doyoueq.com/lessons_categories/benni-harper/, which you can easily start/stop and start back up again, based on how much time you have to play. And, with every 15 minutes you spend you'll be amazed how much you'll pick up.  Soon, you'll be designing your own quilts and more using EQ7 software.

Using EQ7 to create the motif 


 Start a new project and name it Flower Wreath.
 Click on the block icon


On the top menu bar click block, new block, patchdraw motif

Click the Bezier Curve tool


Click on the Applique tab and holding down your left mouse draw a left side of the flower petal.  Then repeat drawing the right side of the petal.


Click on the pick tool


Hold the left mouse button down and draw a box around the flower petal, to highlight.

2.        Place your mouse in the center of the highlighted flower petal and right click.  A pop up menu box will appear and you will need to click the “wreath maker” option.


In the WreathMaker menu box set the number of clusters to 6 and your cluster spacing to 70% and resize cluster to 100%.  Click ok.  If you do not like the look of your wreath, you can click the undo and repeat this step with different wreathmaker options, or choose to now manually position each petal on your flower.


You could click the save to sketchbook button to use this applique motif design on your quilt designs, but it isn't necessary for the purpose of using EQ7 to create a design that will be used as a stencil for glass etching.

But I do encourage you to use the save to disc button, to save all your work in your project file.


For the next step of this tutorial, I recommend you click the File button on the top menu bar and Print a copy of this design to your printer.

While this flower is a very simple design, think about how you could use a Fall leaf, holly and berries, pumpkins, witches hats, or a variety of other designs to wreath.  With EQ7, the possibilities are endless!

Now, for part two of this tutorial!


Glass etching with your EQ Flower Motif 


First, gather your supplies for stenciling:

  • glass plate
  • stencil (e.g. EQ Flower motif)
  • small craft paint brush
  • shelf liner adhesive, that you might find at a dollar store or discount store.  
  • one bottle of etchall etching creame
  • exacto knife

Cut a small square (or circle)  of your shelf liner liner adhesive.  Remove the backing and place the tacky side down on the underneath side of your glass plate.  Rub to smooth out potential bubbles.

For your stencil transfer method there are several approaches.  You may want to cut your stencil and use a sharpie to mark, or you may want to use a stiletto and a transfer media, under neath your stencil, such as a carbon tissue, transdoodle paper, etc.  But, use your stencil to mark your design on the adhesive shelf liner.  I used regular printer paper, cut thru the shape with regular craft scissors, and held this stencil on top of my glass plate, with shelf liner adhesive, and used a permanent marker to mark the design.

An exacto knive works well to cut your design out from the shelf liner paper.


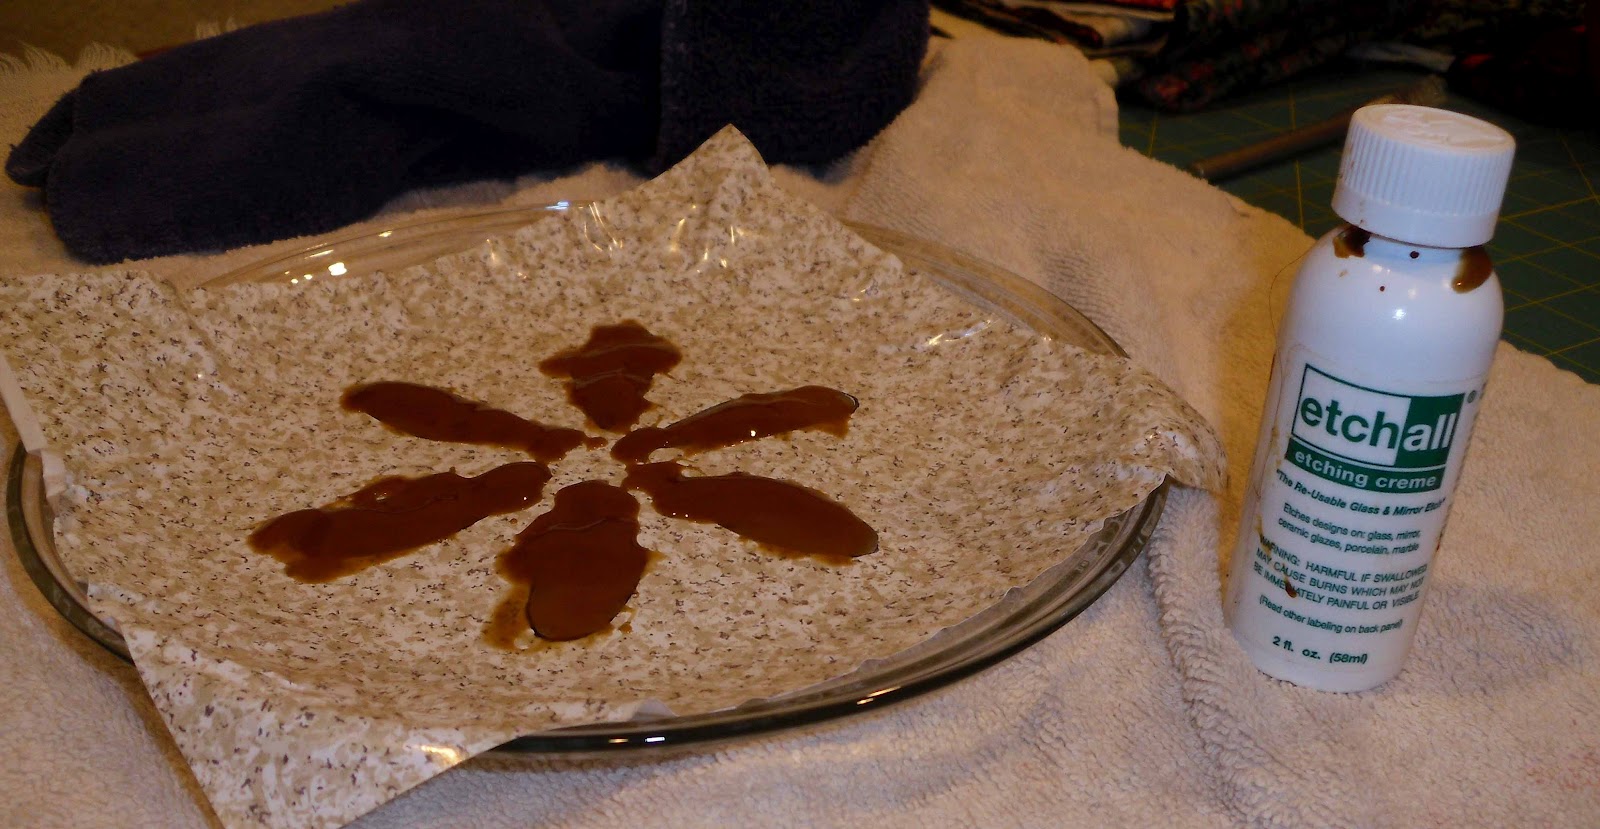
Use a paintbrush to pour the etchall etching cream onto the area of your stencil that you want to etch the glass, but be sure to "pour" and not brush the etching cream.  Let the etching cream stand for 5-10 minutes. Then using your brush to lightly stroke the cream back into the container, for future use.

Take the glass, with residual etching cream, to your sink.  Place few drops of dishwashing soap and lightly rub your project and rinse with fresh water.  Remove the adhesive stencil and re-apply the soap wash to lightly scrub, rinse with fresh water, and dry with a soft towel.  Now you can enjoy your beautiful etched glass plate, with your own custom EQ7 design.


Enjoy your customized stenciled glass that you created with your own unique design, using Electric Quilt software.


I hope you have fun in this Fall EQ Blog hop.  There are oodles of tips, tutorials and inspiration that will be shared at the stops along the way, plus a few giveaways too!   Here is the line up:

Monday, Oct lst
SewCalGal
Beaquilter


Tuesday, Oct 2nd
Marjorie's Quilting Bee 
Curious Orange Cat  

Wed., Oct 3rd
Love Bug Studios


Thursday, Oct 4th
Kissed Quilts
Bits & Pieces:  

Friday, Oct 5th
I Quilt Scarlett & Grey:  

EQ Blog: 


http://electricquilt.com/
http://doyoueq.com/
http://doyoueq.com/blog/


Print Friendly and PDF

Monday, October 1, 2012

Electric Quilt (EQ) Fall Blog Hop & Giveaway


Welcome to the Electric Quilt (EQ) Fall Theme Blog Hop
I'm excited to be part of a group of fellow bloggers that love all things EQ and wanted to share tips, tutorials, inspiration, and a few giveaways with you too, this week.  The concept of this blog hop began with Quilters that use Modern Quilting Tools, as we do enjoy using Modern Quilting tools, such as Electric Quilt software products, and we enjoy sharing insights on our blogs how we use such tools.  You can always visit our blogs and search (e.g. EQ7, Electric Quilt) to find insights that we have shared on the Modern Quilting Tools we use.  And, this week, we are all very excited to be able to share insights with you on how we use various Electric Quilt products.

To kick-start this blog hop this week, I have  a couple of projects that were created using EQ7, but may not be a type of project that you typically think of, when you think of EQ software.  Did you know that EQ7 has been used to help plan gardens, room arrangements, as well as be the most popular quilt design software?


I used EQ7 to create a Fall vest for a wine bottle that will be used in a gift basket for an upcoming charity fundraiser.  You could easily create your own wine vest design in EQ7, but tomorrow I'll share a tutorial show how I used EQ7 to create such a design. And, I'l share my design file to help you create your own wine bottle vest that you can use this Fall.  They are great to decorate your dining table, as well as for hostess gifts.


Another fun, easy and fast project idea that you I used EQ7 with was for a glass etching project!


I made this simple flower design and used the wreath tool in EQ7 to create the petals.


Want to learn how to make these projects?  Click here for my tutorial on using EQ7 and glass etching. And, on Wednesday, I'll share a tutorial to use EQ7 to make the vest design, as well instructions on how to make this cute wine vest.

I hope you have fun in this Fall EQ Blog hop.  There are oodles of tips, tutorials and inspiration that will be shared at the stops along the way, plus a few giveaways too!   Here is the line up:

Monday, Oct lst
SewCalGal
Beaquilter


Tuesday, Oct 2nd
Marjorie's Quilting Bee  
Curious Orange Cat  

Wed., Oct 3rd
Love Bug Studios  


Thursday, Oct 4th
Kissed Quilts: 
Bits & Pieces:  

Friday, Oct 5th
I Quilt Scarlett & Grey:  
EQ Blog:


Two more EQ theme announcements I'd like to share:

Blockbase Sew-Along


BlockBase Sew Along Blog Badge


Starting on October 1, EQ will feature a block to sew from BlockBase every two weeks. At the end of each two week period there will be a link up so you can share a photo of your finished block and we can all oohh and aahh over each other’s beautiful blocks!


Behind the Mouse


EQ has launched  a new blog  called "Behind the Mouse".  Sarah Shriver, Heidi Kori and Jenny Novinsky  will be the voices on this new blog sharing insights, fun free downloads, as well as hosting the Blockbase Sew-Along and other fun activities.  A little birdie told me that the Mouse is also working on some new "add-on" software that will be introduced this Fall and will definitely be announced on this new blog too!

http://electricquilt.com/
http://doyoueq.com/
http://doyoueq.com/blog/


Did I Mention A Giveaway?

Ten lucky winners will receive Fall theme fabric to make their own wine vest:


To enter to win followers simply need to leave a comment on this post.  If you have a preference of which bundle you'd like to win, feel free to let me know and I'll do my best to try to match winners up with their favorite bundle.  Two winners will be randomly selected and announced next Friday.  

This giveaway is also open  to followers world-wide.


Want an extra entry?   Here are a couple of ways you can get extra entries, but for each one you wish to claim, please leave an extra comment on this post to let SewCalGal know you are claiming this extra entry opportunity:


1) If you are a member of the Quilters with Modern Tools, you can claim an extra entry in this giveaway. But, please help me out by including the name of your blog.
2) Visit all of the blogs participating in this blog hop, publicly follow all of them and you can claim this extra entry.

Ten winners will be randomly selected and announced late Sunday, October 7th.

Print Friendly and PDF

Monday, July 30, 2012

Flip Flops for Quilters

Sometimes Quilters come up with the best way to use scraps.  Last summer, while attending a class, a quilter from Arizona was wearing the cutest  flip flops made embellished with fabric scraps. She said all of her quilting friends had made their own version and wore them to guild meetings, classes, sew-cials, etc..


Of course, I had to make a pair using Hoffman Batiks.   I simply used scraps that were about 1/4"x5" and tied them tightly around the strap of the flip flip.  I was also able to pick up flip flops on sale at JoAnns for about $.50 per pair, so these are pretty economical flip flops.

I think they'd also look cute on a wall, table decoration, bridal party shoes (before or after the event) and many more uses too.  Definitely a fun summer DIY Project that I think would also be great for kids or any non-sewing enthusiast, given it doesn't require a machine.

What do you think?


Print Friendly and PDF