
Welcome to Day 3 of the EQ Blog Hop Celebrating A Year of Red and White Quilt Challenges!
Today, SewCalGal wants to encourage everyone to visit Freemotion Quilting By The River . Connie has a delightful blog,
where she frequently shares tips, tutorials, inspirational projects and also hosts super fun quilty events. And, she is a designer that uses EQ SW and has also shared many excellent EQ tutorials on her blog.

I want to encourage those that have EQ software to get in and play, design, create, enjoy. You may be knowledgeable or you may be afraid of it. EQ software is so gosh darn versatile it can be overwhelming, especially if you are not use to designing. But it really isn't difficult to learn.
This Red/White EQ Blog hop is all about encouraging EQ SW owners to play and create with their SW, as well as those that may not have this SW to check it out. You can certainly design with out this SW, but most designs published as standalone patterns, magazines, or in quilting books were all created using EQ SW! To me, that is a great compliment to the Electric Quilt Company. But, even if you are not a designer or want to be designer, this SW is very helpful to design your own projects, to audition fabrics, to alter sizes or tweaking designs of purchased patterns to make your own. And, it doesn't take much time at all to learn!
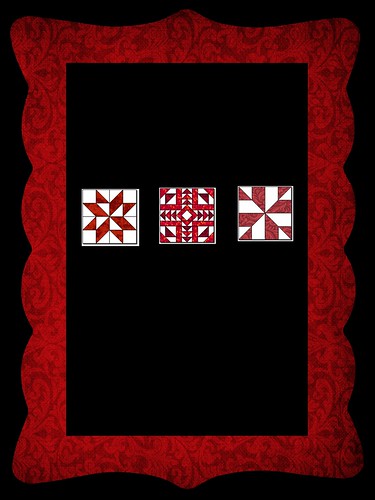
While yesterday I shared insights on how to make some simple pieced blocks in EQ software, today I want to share with you some ideas for how you can use those blocks (or other blocks) to create your own quilt design.

HOW TO CREATE A QUILT IN EQ7
First, there are hundreds of quilt layout designs that come with EQ7. The software(SW) also easily allows you to design quilts for blocks (or applique') for as many blocks and rows that you want, as well as borders and border styles. For the purpose of this tutorial, we are going to focus on a simple block on point design with borders. But before we begin, you may want to watch this short video by Electric Quilt that is available on YouTube (they also have many other excellent tutorial videos).
This Red/White EQ Blog hop is all about encouraging EQ SW owners to play and create with their SW, as well as those that may not have this SW to check it out. You can certainly design with out this SW, but most designs published as standalone patterns, magazines, or in quilting books were all created using EQ SW! To me, that is a great compliment to the Electric Quilt Company. But, even if you are not a designer or want to be designer, this SW is very helpful to design your own projects, to audition fabrics, to alter sizes or tweaking designs of purchased patterns to make your own. And, it doesn't take much time at all to learn!
While yesterday I shared insights on how to make some simple pieced blocks in EQ software, today I want to share with you some ideas for how you can use those blocks (or other blocks) to create your own quilt design.
BASIC STARTING INSTRUCTIONS
note: The tutorial for creating this project, which focused on creating blocks, needs to be completed before going further with this tutorial. Click here to view this previous tutorial.
CREATE A QUILT
1. Click on the Quilt Button

2. On the top menu bar click on Quilt > New Quilt > On Point
3. Click on the Layout tab, located on the bottom of your screen. Set for 4 blocks horizontal and 5 blocks vertical. Set the finished block size to 12".

4. Click on the borders tab and set border number 1 at 3" for left, top, right and bottom.
5. Click on the add button to add border number 2. Set .5" for left, top, right and bottom. Set style to mitered.
6. Click on the add button to add border number 3. Set for 3" for left, top, right and bottom. Set style to mitered.
7. Click on the paintbrush to select your colors and paint the border. Set style to mitered.

8. Click Add to Sketchbook

9. Click Add the set block button

Your sketchbook will appear showing all your blocks you have saved to your sketchbook. The blocks from the prior tutorial should be displayed in your sketchbook. Use your mouse to click on one of those blocks and then click on the blocks in your quilt layout displayed on layer one to set a block. Continue to click on blocks to paint the block you wish to display, rotating to use two alternating blocks for this design.


10. Click Add to Sketchbook
10. Click on the save file button.

You can now print the fabric requirements for this quilt, as well as the quilt image, if you wish. Just click on Layer 1 and use the File > Print options from the main menu bar a the top of your screen.
17. Click the file exit option on the main menu bar.
Congratulations, you have now created a quilt design with blocks on point.
This is a simple quilt design, but one that I hope you have fun applying to a variety of blocks to create unique designs.
Don't forget today you'll want to visit Connie @ Freemotion Quilting By The River.
Come back tomorrow for more tips and a tutorial on using some advanced features in E7.
Feel free to email me if you have questions on this tutorial, or the Year of Red and White Quilt Challenges.
Here is the line up for all the blogs that are participating in this EQ Blog Hop this week. SewCalGal hopes you'll visit all of the blogs and have fun, enjoy the tips and tutorials, as well as enter some of the giveaways that you may find. SewCalGal will also be sharing tips, tutorials and hosting a giveaway throughout this blog hop.
Monday, January 27th
Tuesday, January 28th
Wednesday, January 29th
Thursday, January 30th
Friday, January 31st

5 comments:
Maybe I need to invest in this program, thanks for the tut!
This is a great tutorial and a clear explanation of EQ. (Also makes me want it even more!) Wonderful post! I'm off to see Connie now....
Thank you SewCal Gal!!! I have just begun my journey with EQ7-lots to learn!!! I appreciate every little bit of information in this exciting process!!!
As a new EQ user I really appreciate all you have done for these tute's!
Thanks for the tutorials.
Post a Comment