
Today SewCalGal is participating in a EQ Photo Fun Blog Hop, hosted by Carol of FunThreads Designs. We hope to inspire you and increase awareness on how you can incorporate photos into projects you design in EQ7. And, SewCalGal thinks you'll be amazed with the insights, tips, tutorials and inspirational projects shared by the participating bloggers in this blog hop. Plus, there is a great giveaway opportunity too!

Today, SewCalGal wants to share insights on some of my favorite uses of the EQ Image worktable, which offers a vast amount of functionality within EQ7.
 .
.
One of the most popular uses of the EQ Image worktable is to create memory quilts. You can easily upload a photo to EQ7 software, edit your image and decide how you want to place your images on your project.
It is also easy to size your images in this software and print your image to EQ Printable fabric. There are a many varieties of Printable fabric, but Premium Cotton Lawn Inkjet Fabric is SewCalGal's favorite.

You can easily print your pictures to EQ Printables and piece them into your projects to create special memory quilts.

Or even a seasonal "memory quit" table runner.

It is very easy to use EQ7 to decide what blocks, fabrics and images you may want to use in your project.

And, as I'm a batik lover, I'll share that I just purchased the most recent EQStash online which has over 1,100 new batik fabrics from top fabric manufacturers such as Hoffman, Island Batik, Moda, Robert Kaufman, and Timeless Treasures. Wow, am I having fun designing with these beautiful batiks too!

The Image Worktable will also allow you to:
- Trace a photo to create an quilt design
- (e.g. applique design, paper pieced design, etc.)
- photo editing
- resize
- rotate
- flip
- cropping
- hue saturation and lightness
- color changing
- apply effects to create watercolor artwork (47 different options)

- create an art quilt / photo collage quilt

- photo layout to create backgrounds/print your own fabric
- And, it is also a popular tool to create quilt labels

- And, you can even use the Image Worktable to create greeting cards! Imagine sending out personalized greeting cards throughout the year, that could contain your photos, favorite clipart, as well as designs that you've created in EQ7!


TUTORIAL - Create A Quilt Label:
For those with EQ7, here is a mini tutorial to help you get your feet wet with the image work table in EQ7. This exercise will show you how to create a quilt label, as shown above. But you can also use this tutorial to create clip art to make a greeting card, or for your blog.
Start a new EQ7 project and name it Playing with Images.
Click the work on Quilt button ( located on your top menu bar)

Click on the Layout tab and change the settings to:
1 block horizontal
7" wide
5" high
(or your desired size)
Click on the Borders tab and change the settings to:
.5 for all sides of the border.
Click on Layer 2 tab.
Click on the Text tool icon

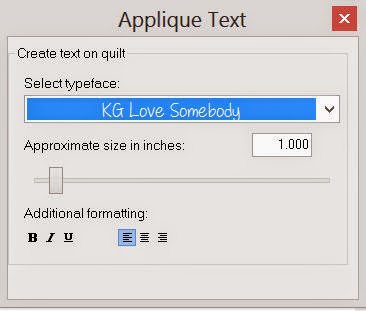
In the popup menu for Applique Text that appears select your favorite font and size of your text.
Press and hold your Shift Key while clicking your left mouse button down and draw a box on Layer 2 for where you want your text to appear.
Using your mouse click once inside of that text box and now type the text you wish to add to your quilt label.
Click the paintbrush icon and select the color (or fabric) that you want your text to use.

Now click on your text to "paint it the color you wish.
Click on Image Worktable in the menu icons.

Click the upload an image icon.

Browse to where the image you want to play with is located. Open it and then you might want to crop it before you start.
click the Zoom Fit button

Browse to where the image you want to play with is located. Open it and then you might want to crop it before you start.
click the Zoom Fit button
click the crop button and use your mouse to grab the nodules on the dotted line around your picture, to drag to where you want to crop. Essentially you reframe your picture and then click the checkmark in the green circle (on the main menu bar) to accept the change.


Click the Add to Sketchbook button.

Repeat for as many photos you wish to add to your quilt label.
click on the work on quilt button
click on the layer 2 tab (at the bottom of your menu)
Click on the set photo button


You can click on the export image button to create an image that you can use as clipart to print a greeting card, share on your blog.
You can click on the export image button to create an image that you can use as clipart to print a greeting card, share on your blog.
You can also click File > Print > Quilt and print this image on Electric Quilt Printable Fabric to use as a quilt label, as you feel appropriate.
You can save these images each time you make a change and they are saved to the Photo section of your sketchbook. Design quilts with these unique pictures and print them on photo fabric for one of a kind quilts.
TUTORIAL - Create A Greeting Card:
Click on the Work on Quilt Icon
Click on the layout tab and use the following settings
Number of Blocks Horizontal = 1
Vertical = 1
Finished Block size = 8.5 width and 11 height
Sashing = 0
Click on the borders tab and set to 0 borders
Click on the Work on Image Icon
Click on the Upload Image icon and browse to find the image you want to
upload.
Click add to Sketchbook
Click on the Work on Quilt Icon
Click on the Layer 2 tab
Click on the set photo icon
Click on the photo in the “Sketchbook Photos” that you want to place on
the cover of your greeting card.
Hold down your shift key and your left mouse button and draw a box on
Layer 2 in the lower right quadrant
Click on the Adjust Icon and click on your image to move or resize
it. To move simply click on your image
and hold down your left mouse button and drag your image to the location you
desire. To change the size of your image
you can use your left mouse to click on any of the crosshair boxes on your
image and hold and drag to change the size.
Or, type in the measurements you desire in the size box on the menu bar
and press enter.
Caution: Be careful to change
the size of your image keeping the scale aligned to the original image to avoid
distortion of your photo (e.g. don’t stretch too tall or too wide, unless that
is what you intend to do).
Click on the text icon to add text to your greeting card.
An Applique Text popup box will appear. Select a font that you wish to use and set
the size of your font, as desired.
Use your mouse to draw a box in the upper left quandrant by holding
down your shift key and your left mouse button.
Click inside of this box and type “Happy Easter”, or your appropriate
text. For my sample, as I used a 1” font
size, I inserted enter after the Happy to get my text to appear on two lines.
Click on the paintbrush color to select a color (or fabric fill) for
your text.
Click on your text with your paintbrush to paint your text the color
you have selected.
Click on the adjust tool and click on your text.
Type 180 in the rotate text box

Click the save to sketchbook button
Click the save button to save your file.
Click File > Print > Quilt
On the Print Quilt Pop up menu, be sure the following options are
unchecked:
Print Name
Print Block Outline
Print Patch Outline
Before you click the “print”, to send to your printer, consider
printing your card on a heavier paper than typical everyday inkjet paper. You may want to use a white cardstock for
your greeting card, but really just about any paper that you can run thru your
printer will work fine
Fold your paper in quadrants to create the greeting card and you are
ready to give your handmade greeting card away.
You can also save this card to an image and print a card from your
photo manager. From the main menu in EQ7
click File > Export Image. But be sure when the “Export Image File of
Quilt” pop up menu appears to uncheck Outline Patches and Outline blocks.
Think of the possibilities of adding quilting blocks, appliqué, or an
endless variety of photos or clipart to personalize your greeting card. Of course, I’d love to see what type of
greeting cards (or quilt labels) that you create with the Image Worktable and
EQ7. Super Easy Peasy and Fun. And if you have questions about this tutorial, simply email me 

33 comments:
I have done several photo quilts and love the small pieces I have done using heritage photos....lovely and meaningful keepsakes.
I love EQ, but wish I was more experienced with everything it does.
I would make a memory quilt with photos for my Mother who turns 93 in August.
Thanks for the change to win the great prizes.
I am enjoying this hop as this is part of EQ I would really like to use.
I'd love to try it out!
Excellent tutorial! So much fun stuff...love the colored sheep!
I use my EQ7 to design projects that are different then the 'normal patterns'. It's great to resize blocks to make a collage quilt.
I love this photo idea and deffinately will be using it!
Thanx. D.G. L
Thank you for the step by step tutorial for creating a quilt label in EQ7 ~ well done.
P.S. Love the "Fox says" header, it tickled my funny bone.
Hadn't thought of a label. I need to find out how to add the words. Thanks
I think I will start to use photos for my quilt labels, especially for the special gift ones. Thanks for the tutorial.
I might like to try it out some time - thanks for showing how you do it :-)
fun fun :)
Thank you for the tutorial. I have not yet used EQ for a quilt label, but like the thought of incorporating a photo on the label.
It would be fun to make a baby quilt with pics of her, or make it with different pics through the years and give it to her on her graduation day :)
I cant wait to try your tutorial. Thank you for that.
Thank you for all these lessons. These will really help.
I would incorporate my childrens' pictures into quilts for them. Thanks for the giveaaway. sarah@forrussia.org
I would love to make a special photo quilt for my son of pictures of him through the years including one of him graduating from medical school this year.
Just one more reason I admire you....the things you are so willing to share with the rest of us so we can easily and quickly use our software to create new things. Thank you!
Smiles,
Kelly
I like the idea of creating labels like this, thank you.
Thank you for the great tutorial, I would love to try this.
Thanks for sharing this awesome lesson, and the great things EQ does.
Thanks for the tutorial. I have EQ7, but haven't become conversant with it so it doesn't get used, in favor of graph paper and a straight edge. With I knew more. Actually, what I really wish for is to win a long cruise that is essentially an EQ workshop among all of the other bennies.
Wonderful info and a great tutorial! I really need to start making labels for my quilts and it would be fun to have a photo in it! Thanks for sharing!
I would like to do an picture quilt of my family. Photos are quickly becoming a thing of the past as everything is now on computers. This would be out for others to see.
I have never used EQ7, but I always read about how it is so wonderful! I would love to try it in the future. Thanks for sharing all of the cool things it can do! -Brittany
I haven't given this a try, but plan to give the label a test drive--looks like fun! Thanks for the tutorial!
I printed a tulip garden photo of mine onto EQ fabric and then thread painted areas for accents. Framed it with a fabric frame. Love it.
Oh, you temptress! As if I didn't already have enough reasons to covet the EQ design software! Well, I've made it pretty clear to my husband that I'm expecting EQ7 for my birthday next month. Meanwhile, I've been using EQ's printable fabric sheets myself for the first time this week. I scanned in my son's fifth grade class's artwork and printed each painting onto a fabric sheet that I'm using for a class raffle quilt. I was REALLY nervous about trying to put fabric through my printer, but the product worked really well and I was surprised by how easy it was. The only goof I made was that I ripped the backing paper off diagonally from a corner, skewing the fabric grain so I had to go back and straighten each sheet with steam ironing afterwards.
Great EQ tutorial. The photo image quilt labels will make wonderful labels for baby quilts. A picture of the newborn and voila a super cute, super unique label. Thanks for participating in this blog hop and offering a giveaway.
Love the tutorials. I think I will use EQ7 to make a quilt label with a picture for my next quilt. I'm also thinking it would make nice gift tags and luggage tags as well as cards. Much more versatile than I had thought. Thanks for the great tutorials.
Love making photo quilts. Have several ready to go but haven't had time yet to get them made.
Our niece and nephews have a new puppy. I'd love to make them a little wallhanging with pictures of the new addition in all of his puppy cuteness. Soon enough he'll be a big dog...Cute, but not puppy cute.
I would make a wedding memory quilt.
Post a Comment