Angela Walters is a Free-Motion Quilting (FMQ) Expert who is also a professional longarm quilter, teacher and author. Many of her customer quilts have gone on to win awards in major quilt shows, as well as get published in popular quilting books. She has also published three excellent books on free-motion quilting, with her fourth book to be released this coming summer.
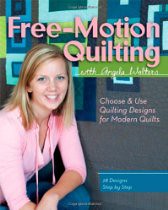
Free-Motion Quilting with Angela Walters

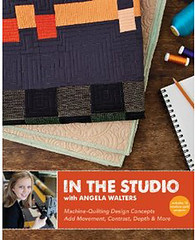
In the Studio with Angela Walters

Free-Motion Quilting Workbook will be released May 19th. Pre-Orders can be placed for signed copies through Angela's online store!

Shape by Shape Free-Motion Quilting with Angela Walters will be published by in September 2014. Pre-Orders can be placed for signed copies through Angela's online store!
While Angela teaches at major quilt shows, she also teaches three classes online at Craftsy. And SewCalGal can honestly recommend all three of these classes to anyone interested in free-motion quilting:
Machine Quilting Negative Space
Free-Motion Quilting With Feathers
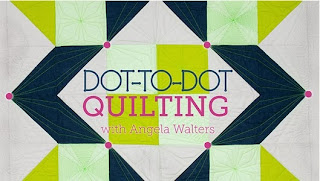
Dot-to-Dot Quilting
But today, I want to share insights with you on Angela's Dot-to-Dot Class at Craftsy.
Like all of of the classes at Craftsy, the filming is high quality and well produced. Angela and the Craftsy team have done a great deal to prepare and plan this wonderful class. It is structured in nine lessons, which average less than ten minutes each where you can easily start/stop any lesson at any point and repeat as often as you like. Thus, this class will work with even the busiest of quilters as it is so flexible! And, I'm confident you'll be happy to fit this class into your schedule without ever having to pack up your machine and supplies to go to attend a class!
Dot-to-Dot free-motion quilting techniques have been around for quite some time, but I Angela does the best job I've ever seen for teaching this technique. And she also shares insights on how you can incorporate other FMQ designs with the dot-to-dot technique to create your own designs and stunning quilting your projects. What I enjoy most is that while Angela shows you how to mark your quilts for Dot-to-Dot techniques she also shows you and inspires you to use these techniques with and without marking, to make this technique a fun and fast way to topstitch quilt your projects and have fun creating beautiful quilts. I'm also inspired by her quote......
Course materials provided in this course include information to make an optional class sample quilt which measures 42½" x 42½" finished, as well as great visual drawings of the core designs shared in this class to help you apply them on the class sample quilt. There is also an excellent guide for Metric conversion, which will help with yardage and seam allowance conversion, is also included.
SewCalGal feels Craftsy provides an accurate description of the class, but overlooked sharing how much fun this class really is:
Class Description
Forego tedious marking techniques in this fun, inviting introduction to dot-to-dot quilting. Instructor Angela Walters shows how to shed anxieties about perfection and embrace the journey as you quilt three primary designs and their variations that can be used in endless combinations, on anything from visually striking blocks to delicately designed borders. Imagine new ways to rotate, invert, resize and replicate each design to create unlimited quilting possibilities. Also gain more control over the speed and direction of your stitches while creating beautiful art!
This Dot-to-Dot class is perfect for quilters of all levels. SewCalGal loves how this technique is easy to learn, forgiving, and flexible, plus you can easily integrate it with a other free-motion quilting designs.
The class lessons are structured as follows:
LESSON 1: - INTRODUCTION TO DOT-TO-DOT QUILTING (3:03)

Machine Quilting Negative Space
Free-Motion Quilting With Feathers
Dot-to-Dot Quilting
Like all of of the classes at Craftsy, the filming is high quality and well produced. Angela and the Craftsy team have done a great deal to prepare and plan this wonderful class. It is structured in nine lessons, which average less than ten minutes each where you can easily start/stop any lesson at any point and repeat as often as you like. Thus, this class will work with even the busiest of quilters as it is so flexible! And, I'm confident you'll be happy to fit this class into your schedule without ever having to pack up your machine and supplies to go to attend a class!
Class Description
Forego tedious marking techniques in this fun, inviting introduction to dot-to-dot quilting. Instructor Angela Walters shows how to shed anxieties about perfection and embrace the journey as you quilt three primary designs and their variations that can be used in endless combinations, on anything from visually striking blocks to delicately designed borders. Imagine new ways to rotate, invert, resize and replicate each design to create unlimited quilting possibilities. Also gain more control over the speed and direction of your stitches while creating beautiful art!This Dot-to-Dot class is perfect for quilters of all levels. SewCalGal loves how this technique is easy to learn, forgiving, and flexible, plus you can easily integrate it with a other free-motion quilting designs.
The class lessons are structured as follows:
LESSON 1: - INTRODUCTION TO DOT-TO-DOT QUILTING (3:03)
Angela talks about her three favorite dot-to-dot designs that she'll be sharing in this class: starburst,diamond,lattice and variations of these designs.
The class requirements do ask that participants have basic free-motion quilting skills (e.g. how to make a quilt sandwich, how to move your quilt sandwich on your domestic machine.
Course materials, which includes an optional quilt sampler design that is perfect for using in this class are reviewed. And Angela shares insight that while she'll be doing the quilting in this class on a domestic sewing machine, the techniques work well on a longarm machine.
LESSON 2: QUILTING STARBURSTS (7:29)
Angela teaches you how to create a beautiful starburst design, using the dot-to-dot technique. This design is perfect for blocks (but adaptable to borders and sashing). She also show insights on marking or not marking, before you stitch out this design. And, throughout the lesson she tips that include hand positions, rotating your quilt, as well as working your way around your quilt.

You also begin to learn how to incorporate other free-motion quilting designs with the dot-to-dot techniques.
SewCalGal loves the designs that are shared in this lesson. Absolutely perfect for modern quilts, but they are also perfect for incorporating into many contemporary and traditional quilts too! And I appreciate all the insights which are shared on tools (FMQ foot, slider, and rulers for those that want to apply these designs via a longarm machine.), as well as repositioning your hands while quilting.
LESSON 3: STARBURST VARIATIONS (6:27)
This lesson focuses on variations of the starburst shared in the previous lesson as this design gets applied to triangles, hexagons, and also a starburst design with an echo inside.
Offset Starburts designs where the center of the block moved to various points on the block to create a completely different look of the Starburst design.
Angela also talks about symmetrical designs, wonky versions,
thread selection tips and tips for addressing a few common mistakes in FMQ.
LESSON 4: QUILTING DIAMONDS (7:09)
This lesson shows how use the corners of a block to stitch out a diamond design. You can also use fabric marking pens, as desired to mark the "dots". Angela walks you through how the diamond is stitched, reviews the course materials that also shows you how to do this, as well as demonstrates how to do this on the machine.
At any point in any lesson, you can ask a question by posting it on the forum. Within a short time you'll get a response by the teacher, and fellow students can respond to help each other. But, by taking time to read questions and answers posted by others, you also get a wealth of more insights.
LESSON 5: DIAMOND VARIATIONS (8:09)
Building on the simple diamond design taught in the previous lesson, Angela goes over how to incorporate multiple diamonds within a block.
More insights are shared to help you add your favorite FMQ designs with dot-to-dot designs (e.g. swirls, pebbles, etc).
LESSON 6: QUILTING LATTICES (8:34)
Angela shows an interesting design she calls "Lattices", that uses a dot to dot technique which is perfect for large blocks and lattice. When used in connecting blocks this decide creates a grid, which Angela calls Laticeses.
Tips are also shared for traveling, thread selection tips, marking for reference points and more.
Quilting diagram from the class handouts. Angela walks you through the start to stop of this design so you understand it fully, before she gives you a demonstration of how she actually stitches it out on the machine.
LESSON 7: LATTICE VARIATIONS (8:53)
Quilt lattice designs outside of your primary block create an interesting secondary designs on your quilts.
One of the variations that I fell in love with, Angela calls the Fan design.
In this lesson, you learn how to create the Fan design on your quilts, along with many tips to evenly space your design using marking and non-marking techniques. The ultimate goal is to get even spacing without having to take time to mark.
Here is an example that Angela has shared on the Craftsy forum of a quilt that used the Fan design, along with many other free-motion quilting designs. SewCalGal thinks this quilt and quilting is absolutely gorgeous.
It is fun to learn how Free Motion Fillers can add dimension to your quilt.
And the variations of the Fan design are also fun to stitch on your quilts.
LESSON 8: DOT-TO-DOT QUILTING IN THE BORDERS (10:28)
Learn how to use dot-to-dot quilting techniques for your borders to create interesting looks for your quilt. Angela shares two great dot-to-dot designs that are perfect for borders: the Starburst design and using Curved lines.
You'll learn tips for straight lines and curved lines, marking, corners and more. And you'll learn how to apply these techniques to sashing too!
LESSON 9: INSPIRING EXAMPLES OF DOT-TO-DOT QUILTING (9:41)
In this lesson, Angela shows how you can break a part dot-to-dot designs and combine with other designs to create completely different effects. You'll learn how to combine straight lines and curved lines!
This lesson is where the whole class comes together. For example, the Starburst design that was taught in an earlier lesson is used to apply to borders. And the Diamond Design, which was also taught in an earlier lesson can be broken a part and used in set in triangles and more. And, you can make these dot-to-dot designs even more spectacular by filling them with other free-motion quilting designs.
Throughout this lesson Angela also shares inspirational projects and shares many wonderful tips.
And a recap of the optional class project and how all of the designs shared in this class have been incorporated into this spectacular quilt that shows off the dot-to-dot designs, as well as other free-motion quilting designs.
SewCalGal loves this inspirational quote from Angela:
This Dot-to-Dot Free-Motion Quilting class with Angela Walters is perfect for quilters of all levels. Your mind will be swimming with ideas of possibilities for how you can use these designs and techniques on your quilts.
SewCalGal highly recommends this class, as well as the other FMQ classes at Craftsy with Angela.
LESSON 3: STARBURST VARIATIONS (6:27)
This lesson focuses on variations of the starburst shared in the previous lesson as this design gets applied to triangles, hexagons, and also a starburst design with an echo inside.
Offset Starburts designs where the center of the block moved to various points on the block to create a completely different look of the Starburst design.
Angela also talks about symmetrical designs, wonky versions,
thread selection tips and tips for addressing a few common mistakes in FMQ.
LESSON 4: QUILTING DIAMONDS (7:09)
This lesson shows how use the corners of a block to stitch out a diamond design. You can also use fabric marking pens, as desired to mark the "dots". Angela walks you through how the diamond is stitched, reviews the course materials that also shows you how to do this, as well as demonstrates how to do this on the machine.
At any point in any lesson, you can ask a question by posting it on the forum. Within a short time you'll get a response by the teacher, and fellow students can respond to help each other. But, by taking time to read questions and answers posted by others, you also get a wealth of more insights.
LESSON 5: DIAMOND VARIATIONS (8:09)
Building on the simple diamond design taught in the previous lesson, Angela goes over how to incorporate multiple diamonds within a block.
More insights are shared to help you add your favorite FMQ designs with dot-to-dot designs (e.g. swirls, pebbles, etc).
LESSON 6: QUILTING LATTICES (8:34)
Angela shows an interesting design she calls "Lattices", that uses a dot to dot technique which is perfect for large blocks and lattice. When used in connecting blocks this decide creates a grid, which Angela calls Laticeses.
Tips are also shared for traveling, thread selection tips, marking for reference points and more.
Quilting diagram from the class handouts. Angela walks you through the start to stop of this design so you understand it fully, before she gives you a demonstration of how she actually stitches it out on the machine.
LESSON 7: LATTICE VARIATIONS (8:53)
Quilt lattice designs outside of your primary block create an interesting secondary designs on your quilts.
One of the variations that I fell in love with, Angela calls the Fan design.
In this lesson, you learn how to create the Fan design on your quilts, along with many tips to evenly space your design using marking and non-marking techniques. The ultimate goal is to get even spacing without having to take time to mark.
Here is an example that Angela has shared on the Craftsy forum of a quilt that used the Fan design, along with many other free-motion quilting designs. SewCalGal thinks this quilt and quilting is absolutely gorgeous.
It is fun to learn how Free Motion Fillers can add dimension to your quilt.
And the variations of the Fan design are also fun to stitch on your quilts.
LESSON 8: DOT-TO-DOT QUILTING IN THE BORDERS (10:28)
Learn how to use dot-to-dot quilting techniques for your borders to create interesting looks for your quilt. Angela shares two great dot-to-dot designs that are perfect for borders: the Starburst design and using Curved lines.
You'll learn tips for straight lines and curved lines, marking, corners and more. And you'll learn how to apply these techniques to sashing too!
LESSON 9: INSPIRING EXAMPLES OF DOT-TO-DOT QUILTING (9:41)
In this lesson, Angela shows how you can break a part dot-to-dot designs and combine with other designs to create completely different effects. You'll learn how to combine straight lines and curved lines!
In this lesson, Angela shows how you can break a part dot-to-dot designs and combine with other designs to create completely different effects. You'll learn how to combine straight lines and curved lines!
This lesson is where the whole class comes together. For example, the Starburst design that was taught in an earlier lesson is used to apply to borders. And the Diamond Design, which was also taught in an earlier lesson can be broken a part and used in set in triangles and more. And, you can make these dot-to-dot designs even more spectacular by filling them with other free-motion quilting designs.
Throughout this lesson Angela also shares inspirational projects and shares many wonderful tips.
And a recap of the optional class project and how all of the designs shared in this class have been incorporated into this spectacular quilt that shows off the dot-to-dot designs, as well as other free-motion quilting designs.
SewCalGal loves this inspirational quote from Angela:
This Dot-to-Dot Free-Motion Quilting class with Angela Walters is perfect for quilters of all levels. Your mind will be swimming with ideas of possibilities for how you can use these designs and techniques on your quilts.
SewCalGal highly recommends this class, as well as the other FMQ classes at Craftsy with Angela.
Machine Quilting Negative Space
Free-Motion Quilting With Feathers
Dot-to-Dot Quilting
Free-Motion Quilting With Feathers
Dot-to-Dot Quilting


5 comments:
I'm so inspired by this review! And I love her quote....so often I do things "close enough"! This looks like a wonderful class.
I purchased the Craftsy Free-Motioning Quilting with Feathers earlier today. Thanks for the great review of this class.
Thanks for such a thorough review of Angela's Dot to Dot class -- I'm half way through the Negative Space series and looks like I'll need to dots as well!
Such a great review.....I have subscribed and worked my way through her classes and my experience has been "5 star" all the way!! Her clear, concise way of communicating, with so much encouragement, will have all who take her classes (or purchase her books.....which I have, also) stitching like a "pro" and enjoying it 100%!!!!!
I won Angela's first book "Free Motion Quilting" a couple years ago - I think it was during your FMQ challenge year and I have found it so helpful. I have used numerous of the designs in it and her directions are excellent. I really need to take her classes on Craftsy as I'm sure they will be excellent.
Post a Comment